Physical Address
304 North Cardinal St.
Dorchester Center, MA 02124
Physical Address
304 North Cardinal St.
Dorchester Center, MA 02124
Programming or Troubleshooting a Tasco trail camera is unlike the other available trail cameras. Tasco trail camera is well known for its more straightforward price bracket, basic structure, and simple operation.
For Tasco trail camera setup, You have only three buttons. And as it has only a 5-character LCD sometimes, it’s becoming harder for some users to navigate all the functions.

This writing will explain a step-by-step guide for programming and troubleshooting the Tasco trail camera.
After installing the batteries, you need to place the switch in the Manual Setup (M) mood like our attached CAMPICKER instruction. Otherwise, you won’t be able to fetch any functionality to edit.
Then you can navigate these to setup your trail camera,
For Installing Battery, there’s a separate battery tray. The battery tray can be released by pressing the Eject button at the bottom of the camera (Right below the IRs). The 6MP, 8MP, and 12MP shared the kind of Eject button. You can see the CAMPICKER Battery Release Manual image.

The first message you’ll get in the 5-character LCD is a notification for inserting an SD card. Remember You should insert a full-size Class 10 SD card. 8MP and 12MP both support a maximum 32GB card.
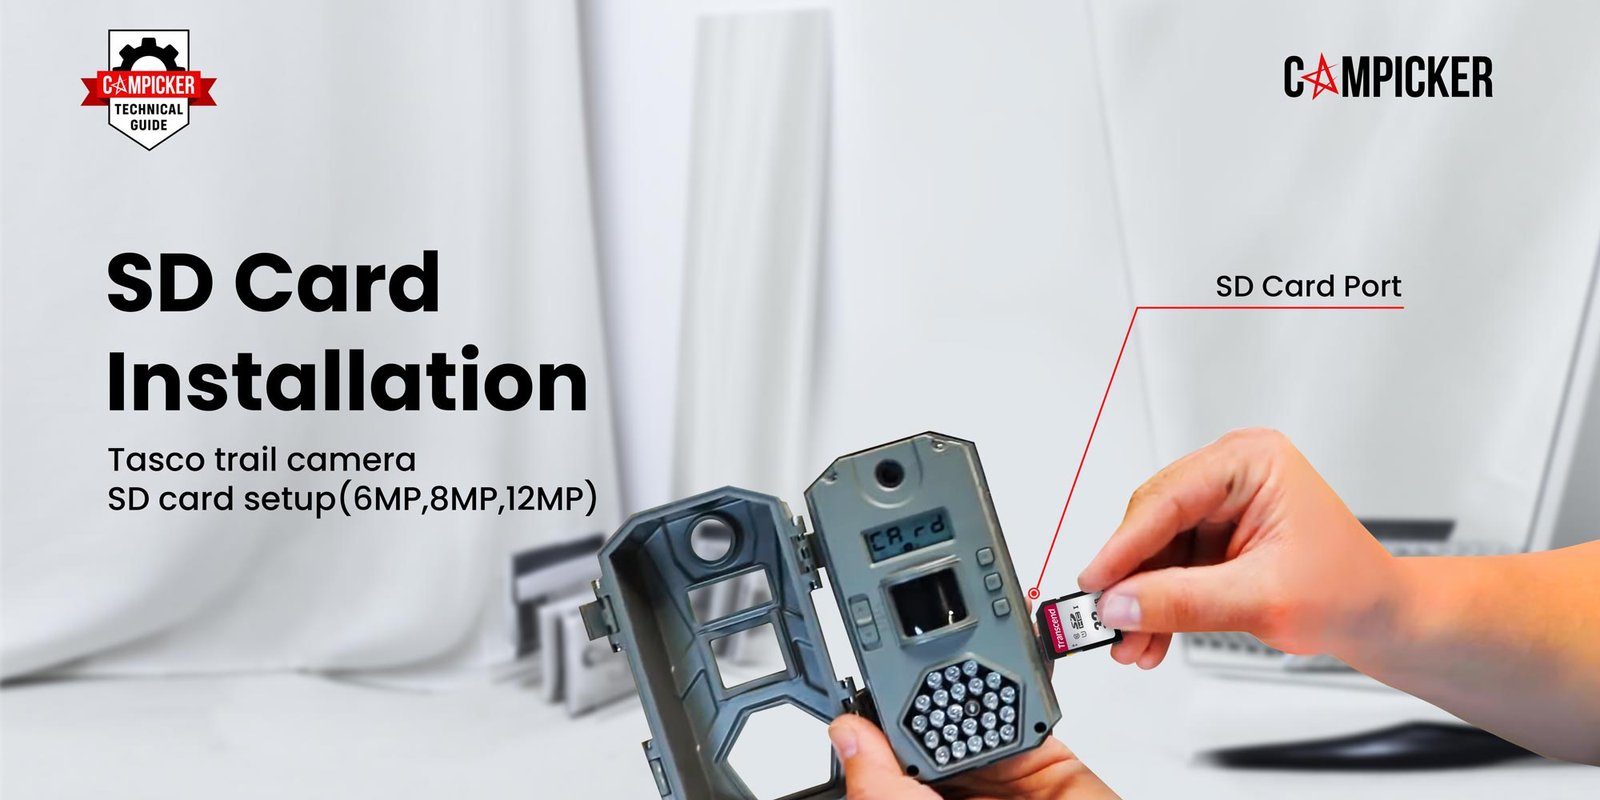
Please try to avoid micro SD cards via an adapter. Because sometimes it ruins videos and photos.
To insert the SD card, find the card slot on the right side of the camera body. And place it according to the CAMPICKER instruction.
Then if the camera accepts the SD card, you may see the display like this image. It indicates the time. In this phase, you can troubleshoot the time and date.
Can you remember how we set up our daughter/son’s wristwatch? That way, we can fix the time, date, and year.
The first one is the hour and the second one indicates minutes. You must simultaneously press the ”OK” button to edit the
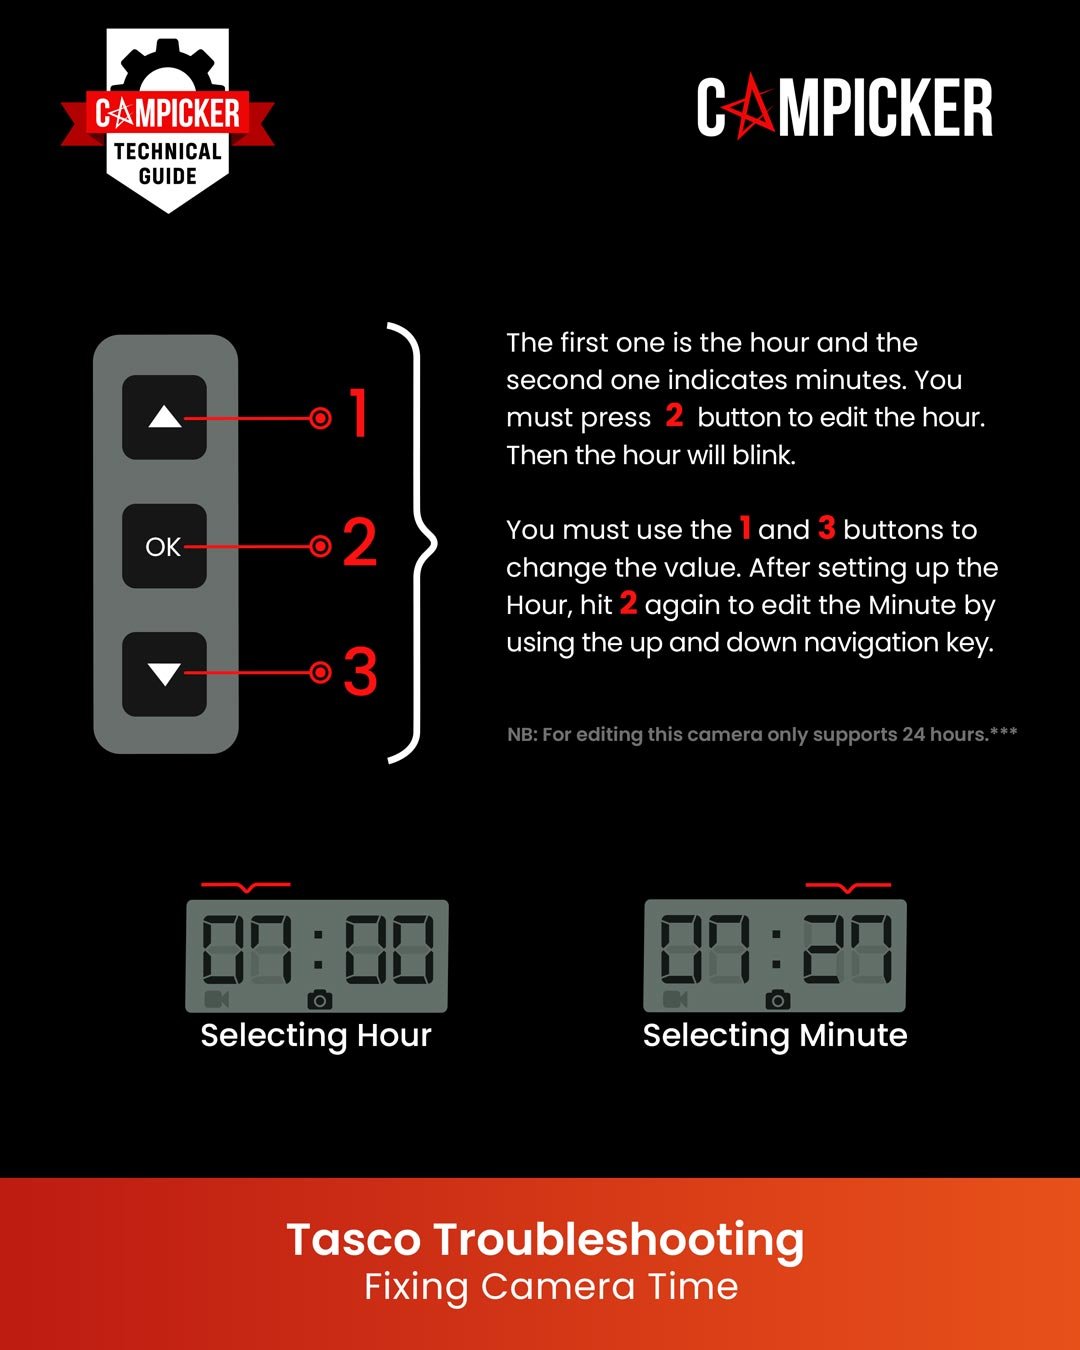
hour. Then the hour will blink. You must use the “Up” and “Down” buttons to change the value.
Remember, this camera only supports 24 hours. So make the hour according to the 24 hours system. Then hit “OK” again to edit the Minute by using the up and down navigation key.
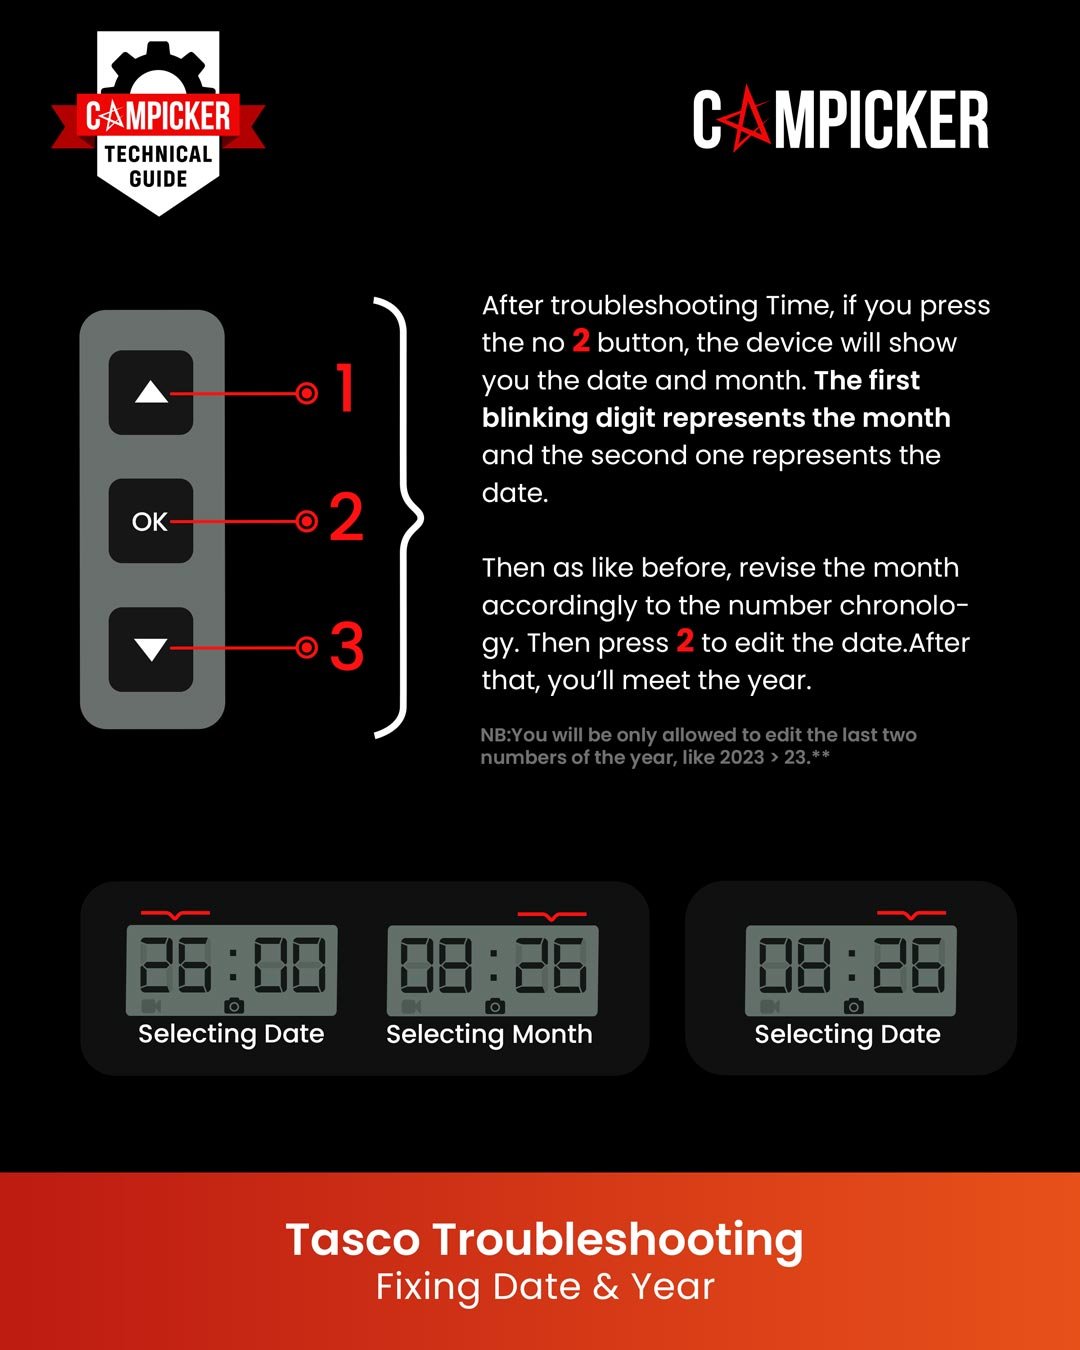
After troubleshooting Time, if you hit the “OK” button, the device will
https://www.high-endrolex.com/28
show you the date and month. The first blinking digit represents the month and the second one represents the date.
Then as like before, revise the month accordingly to the number chronology. Then press “OK” to edit the date.
After that, you’ll meet the year, and you will be only allowed to edit the last two numbers of the year, like 2023 > 23. Adjust the year to get a correct timestamp.
Now it’s time to set up the image capture mood. Tasco has two different perspectives s. It’s really important to know in which phase your camera is now.
The first is a Single photo mood, and the second is a Brust mood. In burst mood, it takes three photos at a time. Before pressing the “OK” button, navigate your necessary photo mood.
A quick tip, as it’s a low-budget camera, it can’t provide a sharp click at the burst mood. So if you are spotting your Tasco for a fast-moving animal like the squirrel, raccoon, etc., please try to avoid the burst mode.
Then if you hit “OK,” you can control your lovely video. We suggest keeping it on. Because the Tasco trail camera is very good at capturing HD (720p) video. You’re gonna love that.
After tweaking the image mood and video option, you can get time frames like 00:05, 00:15, etc.
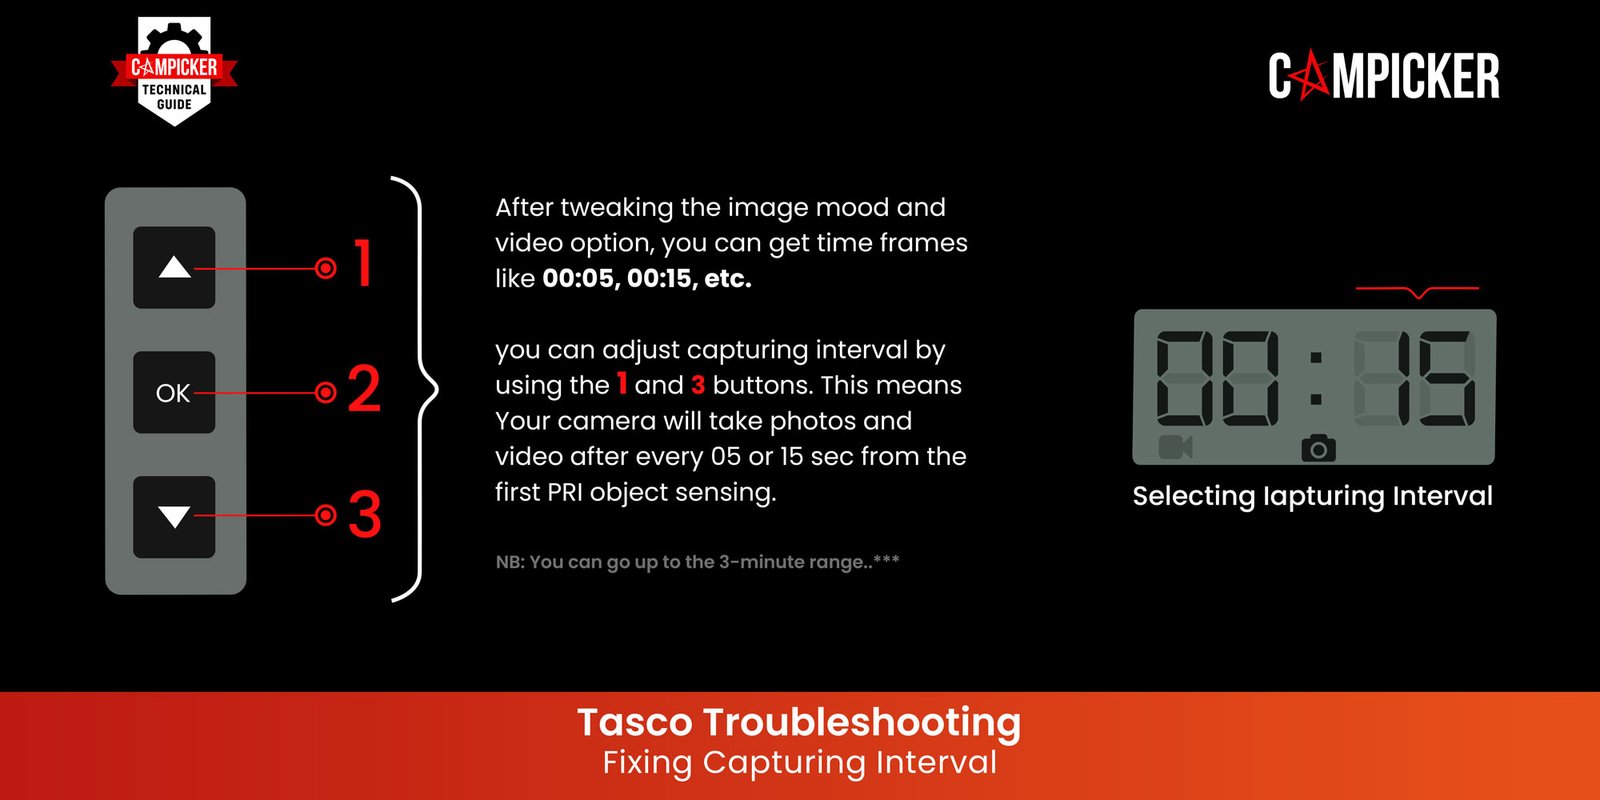
These times indicate your camera capturing interval. This means Your camera will take photos and video after every 05 or 15 sec from the first PRI reading.
You can go up to the 3-minute range. This is kinda impractical, but some people may need this. But this will give you better battery life.
Now you have ID labeling. If you have only one camera, you have nothing to worry about. You can skip this by keeping the factory default.
And if you want to change, just navigate the number through the navigation key.
An ID to your camera is for identifying the image when you have multiple items of it.
For example, in our testing time, we spotted three

cameras in three different lighting conditions to make a complete review of the Tasco trail camera. If you want, you can read that too.
So, in that case, we need to identify which image comes from which camera. And it’s located on the time stamp of your camera.
Then it’s the king of all functionality as the camera’s display is so compact that it’ll prompt “DE Fn/y” like our attached image. This means you have the option to restore all the factory defaults.
If you messed up with any function, you could choose “y” (yes). Otherwise, select “n” (no). Then all of your previous customizations will be saved.
Then, we suggest you format the SD Card by selecting the “y” (yes). This will prepare your SD card to store photos or videos.
Troubleshooting a Tasco camera may feel old school. But Tasco has organized all the necessary functionality. We hope our article will bring value to your reading.
We’ve discussed all the essential steps for programming a Tasco camera properly. But if you face any different problem, feel free to hit us in the comment box. We are here to help.
Thanks for reading our write-up.
You can see our in-depth review of Tasco 8MP & Tasco 12MP.